This article goes through the setup of Tibber Pulse Energy meter, connected to a local network with a IOT network. How to configure the proper firewall settings and rules to access Tibber MQTT server running i AWS cloud.

Tibber Pulse
Tipper Pulse are getting data and power from the HAN port on the Energy Meter. Via Wifi it connected to Tibber’s MQTT service running in AWS.
Tibber has a article describing how to troubleshoot the network pairing. Here we can pick up the endpoint Tibber Pulse communicates with, and this is a1zhmn1192zl1a.iot.eu-west-1.amazonaws.com on port 8883. But from firewall log, it also sent out a tcp packages on port 443, but only once.
a1zhmn1192zl1a.iot.eu-west-1.amazonaws.com is a round-robin DNS pointing towards many ip addresses, so you should include all of the endpoints in your firewall, or have the firewall look up the DNS it self and include all ip addresses. Luckily pfsense have support for this.
# dig a1zhmn1192zl1a.iot.eu-west-1.amazonaws.com +short
34.253.145.184
34.254.30.147
18.200.219.245
63.33.232.165
34.251.236.231
52.214.141.142
52.50.7.2
34.242.166.143
pfSense and the network infrastructure
As you probably know, pfsense as a standard perimeter firewall. It has many nice features, like firewalling, routing, VPN, DNS, DHCP and more. Check out https://www.pfsense.org/ if you like to read more about pfsense.
In this article we are focusing on creating a dedicated security zone for IOT devices. Out of the box pfsense typicality comes with one WAN interface and one LAN interface. WAN connected to a modem or directly to your ISP, and LAN to you local network with computers, mobile devices and more via a wireless router/access point. But we like to separate out all of your IOT devices. To do this you require equipment what’s supports VLAN tagging (virtual LAN, 802.1Q). Not all consumer bases product supports this, but many do now, and it’s not that expensive ether to buy if this look interesting. Alternative you need a pfsense with multiple physical interfaces, connected to a separate Wireless Point. Ether way the setup is more less the same.

When it comes to security, its important to setup VLAN correctly. Its no point in having separate VLAN if a hacker easy can jump between them. Check out: https://cybersecurity.att.com/blogs/security-essentials/vlan-hopping-and-mitigation.
I will not go into detail of how to setup additional interfaces in pfsense. But its quite easy, and many YouTube video’s. Or read the pfsense’s this documentation.
What we focus on here is the firewall rules.
pfSense firewall rules and aliases
Start of by defining a firewall alias for Tipper Pulse cloud endpoint. This is a round-robin DNS, so pfsense need to keep a track of this and update the rules if any changes. Buy default do this every 5.min.
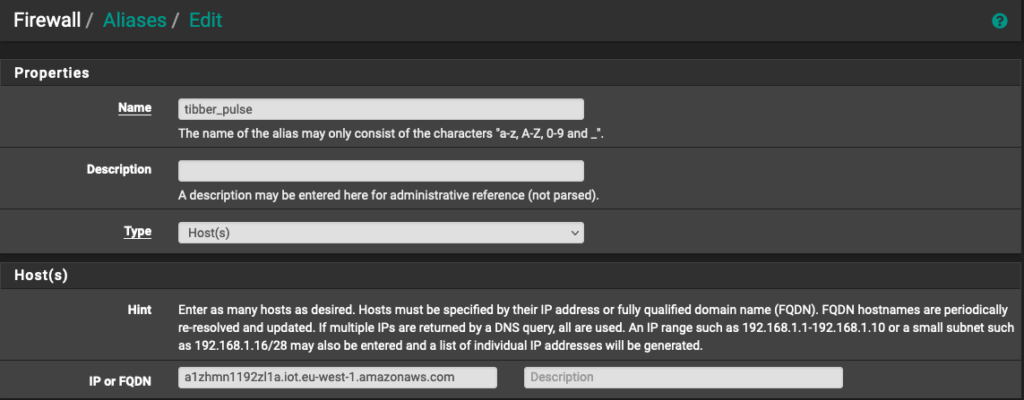
The alias looks like this and can be defined under Firewall -> Aliases. Add a1zhmn1192zl1a.iot.eu-west-1.amazonaws.com in the FQDN field.

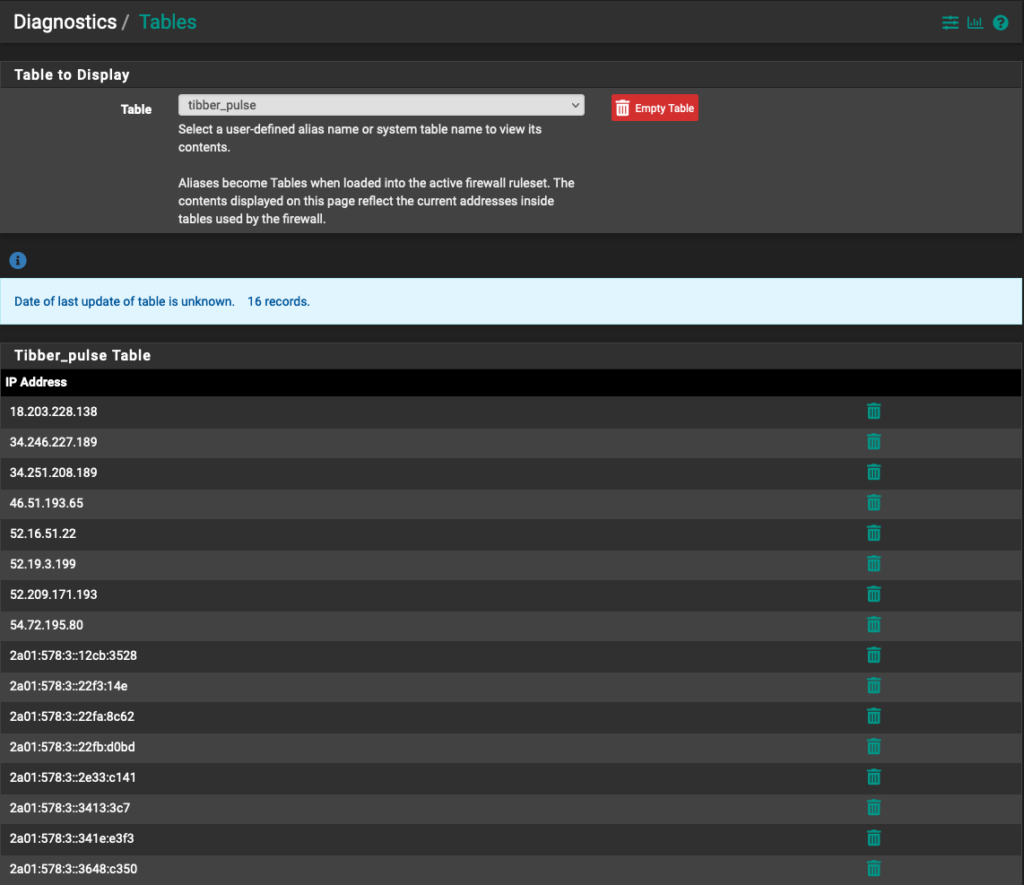
To verify pfsense is performing DNS lookup correctly, jump over to Diagnostics in the main menu and click Tables. You should find you new alias rule there.

Now we can use our defined alias in a firewall rule for our IOT network. Set the alias in the destination host and port 8883 (Tibber’s MQTT port). It should look something like this:

My overall pfsense IOT firewall rule table looks like this. My IOT devices have DNS, Web access to internet and Tibber’s MQTT service. The rest is blocked.

That’s it.
Tibber friends and invite bonus
If you are new to Tibber and like to sign up, use this invite link: https://invite.tibber.com/df699fa6. Then both you and I will receive a invite bonus of 500 NOK. The bonus can be used in the Tibber’s store. Also described in Norwegian here.

